Showing posts with label Snacks. Show all posts

Tuesday, July 29, 2014

Made from Scratch Apple Pie

It's no secret that I love to bake goodies.  I have never attempted to bake a pie though.  For her birthday, Kaia requested I make her an apple pie.  She's on a Supernatural bender.  Neflixing the shit out of it.  Dean loves pie so Kaia loves pie.

I used four recipes to complete the pie.  The crust recipe from the book that came with my mixer, two recipes from the Pioneer Woman, and the super simple whipped cream recipe I shared in June.  It sounds a little excessive, but it was really much easier than expected.

All the ingredients:

Just 10 things.  There are 11 items pictured, but I changed what crust recipe I was using at the last minute and did not use the vinegar.

First up: KitchenAid Pie Pastry (right here is where I would link to the recipe if it were on the internet...)

What you need:  2 1/4 cups all-purpose flour, 3/4 teaspoon salt, 1/2 cup shortening, well chilled, 2 tablespoons butter or margarine, well chilled, 5 to 6 tablespoons cold water.

What to do:

-Place flour and salt in bowl, mix well.  (In stand mixer, stir speed for about 15 seconds.)
-Cut shortening and butter into pieces and add to flour mixture, use pastry cutter to cut them into flour. (In stand mixer, stir speed and mix until shortening particles are size of small peas, about 30-45 seconds.
-Add water 1 tablespoon at a time until dough is just moistened and begins to hold together. Divide it in half, flatten slightly, wrap in plastic wrap, and chill in the refrigerator for 15 minutes.
-Roll half the dough out until it's 1/8-inch thick between wax paper (I used parchment paper), place in pie dish.  Finish it off with pie filling.  Bake as directed.

I only used one of the two because the recipe for the pie itself has THE MOST AMAZING CRUMB TOPPING so I refrigerated the other half to use later.

I peeled, cored, and sliced the apples according to the Pioneer Woman's Scrumpcious Apple Pie recipe.  I used all Granny Smith apples, but it was a little more tart than I would have liked so next time (and there will totes be a next time) I think I may mix in some Red Delicious because my brain was thinking about baked apple, but my mouth said tart apples.  Tossed the apples with lemon juice, sugar, flour, and a little salt.  Then I made that crumb topping.  M'mmmmm..... crumb topping...

At first, I thought the recipe was a misprint because it states to cut 1 1/2 sticks of butter into 1/2 cup of flour, but it is totally correct and as I was cutting it in I realized it mixed up very well.  Then you add in brown sugar, quick cook oats, and a little salt.  Put the apple mixture in the pie dish and top with the crumb topping.  I meant to take a photo because this pie was heaping!  I thought I was going to need a bigger dish!  Instead I just squished it all down, covered the edges of the crust with aluminum foil and baked, baked, baked.  After about 25 minutes, I removed the foil and continued to cook for another 30 minutes.  With five minutes left, add some chopped up pecans.

While that was cooking, I moved on to the caramel sauce, another first, and I followed the Pioneer Woman's Easy Caramel Sauce recipe.  Ermahgerd.  So easy.  So damn good.  You just put brown sugar, butter, half-and-half or heavy cream (I used heavy cream because I also made my own whipped cream), vanilla, and salt in a sauce pan.  Warm and stir. Sample. Sample again just to be sure.  If you think it's too thin, continue cooking.  I followed her directions though and once I let it sit and cool a bit on the counter while the pie was cooking, it thickened up nicely on its own.

As soon as I took the pie out of the oven, I drizzled it with caramel sauce.  When I thought I had added enough, I added more.  I had a lot left over so I put it into one of those El Cheapo condiment dispensers and I may or may not (of course I did!) put some in my coffee in the morning.  Letting the pie cool was the hardest thing to do, but it gave that caramel sauce time to form a nice caramelly crustiness on top of the brown sugary crumb topping.  M'mmm... camamelly crumb topping.....

Then I smacked some whipped cream on that shit and drizzled yet more caramel sauce on top.  And we all sat around drooling, mmmmm'ing, and in awe of the fact that the pie crust turned out awesome!

I was pretty apprehensive about this whole thing.  Pies look so intimidating to me, but this all came together so well.  And really, just 10 ingredients.  I'm already thinking ahead to the holidays.

You get a pie!  And you get a pie!  And, yes, YOU GET A PIE TOO!

*I included the pie crust recipe because it was from a book, but I didn't share the exact recipes of the others because they are easily found online.  Plus I didn't want to even remotely be accused of infringing on anyone's copyright.  Ya feel me?

Wednesday, June 11, 2014

DIY Pizza Pockets

Like most folks, I ogle the beautiful pins on Pinterest.  Knowing damn good and well that when I attempt whatever cutesy do-dad I pin, it will not turn out cutesy.  So I ran across a pin for pizza monkey bread and I said, "Ooo! That looks pretty easy.  I could totally do that!"  I clicked it.

Do you know what happened?  Nothing.  It just linked to the photo.  No recipe.  No instructions.  This was a pain in the ass.  I could have just searched for the recipe, but I made the executive decision to wing it instead.  Instead of monkey bread (because I couldn't make it look right in the bundt pan), mine morphed into pizza pockets.

And here is how I made them...

What You Need:

~Canned biscuits in the amount you wish to make
~Pizza toppings of your choice:  pepperoni, black olives, mushrooms, green peppers, onions, cheese, etc.
~Marinara sauce and/or garlic butter for dipping

How to Make 'em:

1.  Separate biscuits.  Take one and roll it out.
2.  Place ingredients inside.  I suggest not using the marinara on the inside.  Every time I've attempted this has ended in an ugly mess that was less than desirable.

3.  Fold biscuit over and pinch the edges together.  Repeat with other biscuits.
4.  Line a baking sheet with parchment paper.  Bake at 350 degrees for about 15 mins.
5.  Enjoy with your favorite dipping sauce!


A few of mine split open because I didn't roll them out enough.  No worries, they still tasted great!

Tuesday, January 14, 2014

Chicken Salad Sammies


The original recipe that I had every intention of using included grapes, celery, and both dry and liquid ranch dressing.  Mine does not.  See here's what happened...

I forgot the grapes.  I don't like celery.  And...  I thought we had ranch dressing in the fridge because that's a staple that should always be in your fridge, right?  Plus a couple of weeks ago, I'd used a half an envelope of dry ranch dressing mix in another recipe.  As I was getting all the ingredients ready, I realized that we, in fact, did not have any ranch dressing.  No liquid in the fridge.  No half a dry mix packet.

D'oh.

So what do you do when you don't have half of the ingredients?  Just make up your own recipe.  I will tell you that I didn't measure many of these ingredients.  The measurements that I'm showing are guesstimates.  As will most recipes, it's just a guideline.

Ingredients:

1 12.5 oz can of chicken breast
1 tablespoon of Good Seasons Italian dressing mix
1 teaspoon of dry dill weed
1/2 cup of mayonnaise (or salad dressing if that's what you prefer!)
1/2 cup of sliced almonds
Sandwich rolls

What I did:

Drain chicken, place in bowl. Using a fork, break up the larger pieces of chicken to make mixing easier.  Add all ingredients and mix!  Put some of the mixture on a roll.  Done!

I bought some yummy Kaiser rolls in the bakery at Wal-Mart.  I knew we weren't going to eat them for a couple of days so I placed them in the freezer.  Taking them out that morning to thaw.  I also warmed them for a few seconds in the microwave before putting the chicken salad on them.  They were really yummy, but I'd still like to try the original recipe as well!

Recipe adapted from Mom's Chicken Salad Sandwiches.

Tuesday, March 26, 2013

Tasty Tuesday! Mandy's Meat Pies

Most of you probably don't know that several years ago I worked at Wal-Mart for five whole years.  I didn't have to check out groceries.  I had the pleasure of working the jewelry department counter for all of those years.  I took a few things away from that job.  Knowledge about Wal-Mart that I'd rather not have, realization that the time I spent there wasn't the best years in my life (that's a post for another day when I have the guts to be more open) that was in no way Wal-Mart's fault, but my own, and the best jewelry department girls that Wal-Mart has ever seen as friends.

Annie, Missy, Mandy, Christy, Ashley, Tabitha, and Mary were some of the funniest and most interesting people I've met in my life.  There were a few duds in our day... April, Amy, LaVitra..., but we survived them.  Sort of!  We had the best Christmas parties.  Every year Mandy brought her meat pies.  Scrumptious meaty pie-y goodness.  Mmmm....

I had almost forgotten about them until a few days ago when I was going through an old recipe box of mine.  I found the recipe!  I was so excited!  Probably more excited than I should have been about finding a folded up piece of old paper.  I can't wait to share this with y'all!

Mandy's Meat Pies


Ingredients:

3 cans of flaky biscuits
1 pound ground beef
2 cups raisins
2-3 Tbsp ketchup
1/2 cup olives, chopped
1/2 small onion, chopped
3 cloves of garlic, chopped
1 Tbsp teriyaki sauce
1 egg
Meat tenderizer


Do it up:
Preheat oven to 375F.

Cook the beef and drain. Season with meat tenderizer.

Add onions and garlic.

Cook until onions are soft, then add teriyaki sauce, ketchup, olives, and raisins.  Mix well and cook to heat; stirring occasionally.

Roll out individual biscuits until flat.

Spoon meat mix onto dough.

Wet edges slightly, fold, and press with fork to seal.

Stab top of pastry with fork so air can escape and brush tops with beaten egg.

Bake in oven at 375F until golden brown.  Enjoy!

A few notes:
-- I only used two cans of 8 ct. Great Value brand biscuits.  Recipe is easily adjusts to feed more or less people.
-- Teriyaki sauce matters.  I forgot it and they didn't taste the same.

Print Friendly and PDF

Monday, March 4, 2013

Sausage Biscuit Bites

Several months ago my MIL made a recipe she'd pinned on Pinterest.  A twist on the classic sausage ball.  Found at Plain Chicken, the Sausage Biscuit Bites are an easy and quick snack!

What you'll need:

2 cans (10 ct.) flaky biscuits
1 pound of sausage
2 cups of shredded cheddar cheese

How to make:

Preheat oven to 400F.

Mix together sausage and cheese.  Form into about 1 in. size balls.


Separate each biscuit into two layers.  Place one layer of biscuit into each cup on muffin pan.  Than place a sausage ball into each cup.  Bake for 8-10 min or until done.  

The original recipe calls for 40 sausage balls, 40 biscuit layers, and a mini-muffin pan.  I used 32 sausage balls, with 32 layers because I bought 8 ct. containers of biscuits.  I don't have a mini-muffin pan (don't judge me), so I just used a regular pan. Also this can be changed up by using regular, hot, or even Italian sausage!  Not to mention your cheese choices.
Print Friendly and PDF

Wednesday, July 18, 2012

Natural + Organic = HOT DOG!

I know what you are thinking.  The same thing I was thinking when I was contacted about giving Applegate Farms hot dogs a try.  I was skeptical.

Like most people, we enjoy grilling.  Burgers and  brats are staple items on our grill.  We don't often purchase hot dogs.  Admittedly, I try not to think about what's actually in them.  'Cause we all know what's really going on inside that hot dog package.

We've been making a real effort to eat better meat.  I've been purchasing locally and humanely raised meats from our local farmer's market.  When I read up on Applegate I was looking forward to trying their product.

Their animals are raised on an all vegetarian diets with no animal by-products, never given antibiotics or growth hormones.  They are humanely raised and allowed to roam the fields of over three hundred small family farms.  Applegate uses minimal processing and use celery and sea salts to preserve their products, never nitrates or nitrites.  The Natural Uncured Beef Hot Dogs are gluten, casein, and dairy free plus are low in carbohydrates.  One dog only has 2 grams of saturated fat!


You have to try these hot dogs!  Their flavor is something I can almost not describe.  No processed greasy feeling while eating these dogs.  The texture was great.  The ingredients list is small and has completely pronounceable words in it.  No added junk.

  • Beef
  • Water
  • Sea Salt
  • Paprika
  • Dehydrated Onion
  • Spices (Black pepper, Coriander, Mace, and Nutmeg)
  • Nutmeg Oil
  • Celery Powder
That's it and wow... can you really taste it!  I'm so excited to have found a hot dog that tastes excellent and I can feel confident in feeding my children.  

Aren't sure if Applegate products are sold in your area?  Click here for their store locator.  In addition to hot dogs, Applegate also has bacon, sausage, cold cuts, and cheeses!


*I was given a sample of this product for review.  All opinions are my own.


Wednesday, November 23, 2011

Winning by Pinning {Thanksgiving Edition}

Lord knows I have to set myself a timer BEFORE I navigate my browser in the direction of Pinterest.  I could spend an entire day (or month) on that site.  It's like a never-ending love affair with all things interesting and, for me the most bestest of things... distracting!  Since this week here in the US is the wondrously indulgent holiday of Thanksgiving, I decided to do a little search on da Pinterest.  Which brought up a gazillion and one recipes for all things turkey, pumpkin, and green bean.  And that reminded me that I haven't done a post about food.. in  a very long, long, time.  Oops.  I guess I better get on that. Until then though... let's check out some yummy looking Thanksgiving-esque food. EDITED: Added a recipe yesterday!

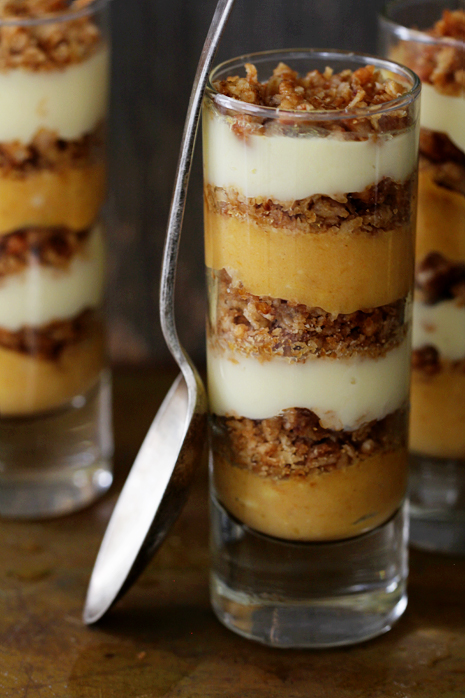
pumpkin praline trifle found here

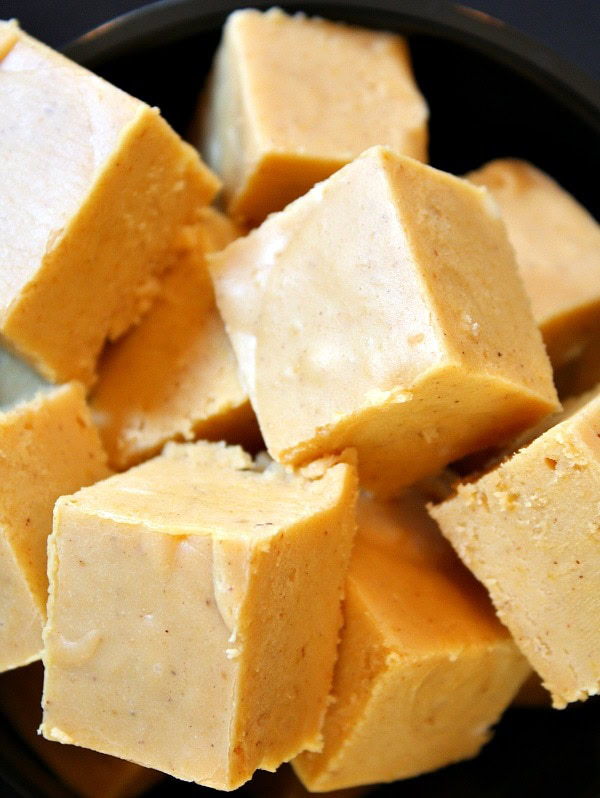
pumpkin fudge found here

classic libby's pumpkin roll found here

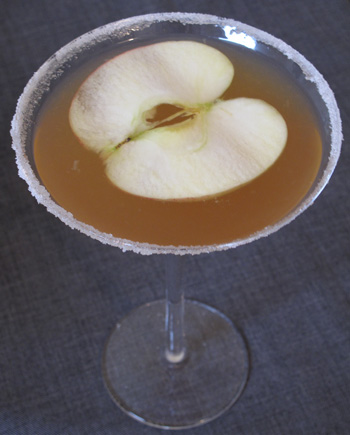
apple cidercar found here

pumpkin pie cinnamon buns with caramel cream cheese frosting found here

Uhh... looking back on this post maybe I should have called this the "Pumpkin Edition".  Happy Thanksgiving everybody!

Wednesday, September 7, 2011

Candied Pecans


Candied Pecans!  Do not copy image.
This is the first time that I've attempted to make candied pecans.  I've eaten them at different family functions, but never made them myself.  They were so easy to make!


Candied Pecans
Print it here!
Here's what you'll need:

1 egg white
1 tablespoon water
1 pound pecan halves
1 cup white sugar
3/4 teaspoon salt
1/2 teaspoon ground cinnamon

Here's how to do it:

Pre-heat your oven to 250F.  Go ahead and grease your baking sheet.

In a large bowl, whip together the egg white and water until it's frothy.  In a separate bowl, mix together sugar, salt, and ground cinnamon.

Add pecans to egg mix and coat the pecans evenly.  Pour pecans into the sugar mix and toss them!  Spread them out evenly on greased baking sheet.  Bake for 1 hour in 250F oven, stirring every 15 mins.

I only made one batch.  That was one pound of pecans!  And they only lasted about 15 minutes in my house!  Super easy to make, super yummy, and they go super quick!  Maybe we should call them Super Pecans!

Thursday, August 18, 2011

How I Make Puppy Chow

or Muddy Buddies or whatever you call them where you are from.  I bought a box of Chex the other day and this recipe was on the side, not to mention I saw it last week too.  I said to myself, "Self, your kids are going to L-O-V-E to eat this when they come home from school in the afternoons."  If your kids are anything like mine when they get home from school, they are starving when they walk in the door.  It's so close to supper time that I don't want them eating a "meal", but a snack.  Honestly, I think I may eat more of them than they do 'cause it's super yummy.  I walk by, grab a handful, pop it in my mouth and travel on my merry way.

Upon looking around my kitchen, I realized I had the ingredients.  Well, I had MY ingredients for them.  White chocolate instead of chocolate chips, extra crunchy peanut butter instead of regular.  The crunchy PB has little bits of peanuts so you get an extra little crunch with your chow.  I was right about the kids loving it.  So much so that I had to make some more!  I thought I'd add it to the recipes since I haven't shared any new recipes lately.


puppy chow 6 puppy chow 5 puppy chow 7 puppy chow 8
You can go to the Chex website and use the exact measurements for their ingredients or you can wing it, like I did.

Put the peanut butter, chocolate (I used almond bark), and butter in a 1 qt. sauce pan.  Melt and blend them together over low heat, be sure to stir consistently so it doesn't scorch.


puppy chow 9 puppy chow 10
Pour mixture over your cereal. I only used about 5 cups of cereal and the recipe calls for 9 cups. There really is so many different ways to change up this recipe. I contemplated adding some raisins to the mix, but I realized I was out at the last minute. Fold in the cereal until it's well coated, then add your powdered sugar.
puppy chow 11 puppy chow 4 puppy chow 3
I used a large Rubbermaid container. Put the top on (or seal your bag) and shake it girl, shake it!!!  Once it's all coated with sugary goodness, spread it out on some wax paper so it can cool off a bit. Then put it in any ol' container you can find! You really should put it in a seal-able container so it doesn't get stale, however, it goes so quickly in our house that I don't even bother.


puppy chow 2 puppy chow 1
Here's the recipe!

What you'll need:
     9 cups of Chex
     1 cup semisweet chocolate chips (or butterscotch chips, or white chocolate, or whatever)
     1/2 cup peanut butter (I used the crunchy kind for extra pea-nutty-ness!)
     1/4 cup butter (or margarine, but let's be honest here... there is nothing better than BUTTER!)
     1 teaspoon vanilla (I didn't add this and I didn't notice that it was gone)
     1 & 1/2 cups powdered sugar (I only used about a cup)

How to make:
     -In a 1 qt. sauce pan, add peanut butter, chocolate chips, and butter.  Warm over low heat while stirring.  Once it's all incorporated, add vanilla.
     -Pour mixture over cereal and blend well.
     -Add cereal mix to a large plastic bowl with top or to a large Ziploc bag.  Add powdered sugar, seal, and shake well.
     -Spread mixture out on some waxed paper to let it cool.  Store in an air tight container.

The Chex website gives instructions for using the microwave to melt your chocolate, pb, and butter together, but I'm not a fan of using the micro for melting chocolate.  I like to have more control over my melting.
Click image to download recipe card for printing!

Sunday, June 19, 2011

No Bake Oatmeal Cookies

A super simple, easy to make, staple in any household, is the No Bake Oatmeal Cookies.  Since the temperature in my neck of the woods has been right about ... HELL... we don't want to be cranking up ye olde stove to heat the house up.  Easy answer... no bake cookies!

Print Friendly Version
What you need:

½ cup (1 stick) butter
2 cups granulated sugar
½ cup milk
4 tablespoons cocoa powder
½ cup peanut butter
2 teaspoons vanilla extract
3 cups quick-cooking oats

How to make 'em:

1. Add the butter, sugar, milk and cocoa powder to a 4-quart saucepan.
2. Bring to a rolling boil and let boil for 1 minute.
3. Remove from heat.
4. Stir in the peanut butter and vanilla until smooth, then stir in the oats.
5. Drop by heaping tablespoons onto wax paper-lined baking sheets.
6. Let cool until set.

The whole process takes about an hour. You'll get about 3 dozen cookies from this recipe. Depending on how big you make 'em!

Sunday, May 29, 2011

Black Bean and Cilantro Quesadillas

{source}
Black Bean and Cilantro Quesadillas
via Whole Foods Market
Serves 2
Print it here!

2 (8-inch) flour tortillas
1/4 cup grated Monterey Jack or cheddar cheese
1/2 cup cooked and drained black beans
2 tablespoons coarsely chopped cilantro


Set a heavy skillet over medium heat. When hot, add a tortilla and warm. Flip tortilla. Sprinkle half of the cheese evenly over tortilla. Lightly cover cheese with half of the beans and cilantro. Top with a second tortilla. Flip and warm on the second side. When beans are hot and cheese is melted, slide quesadilla onto a cutting board and slice into four wedges.

Sunday, May 15, 2011

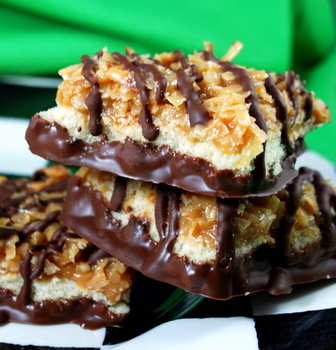
Homemade Girl Scout Cookies: Samoa Bars!

Samoa Bars
via Baking Bites
Print it here!

Cookie Base:
1/2 cup sugar
3/4 cup butter, softened
1 large egg
1/2 tsp vanilla extract
2 cups all purpose flour
1/4 tsp salt


First, make the crust.

Preheat oven to 350F. Lightly grease a 9×13-inch baking pan, or line with parchment paper.

In a large bowl, cream together sugar and butter, until fluffy. Beat in egg and vanilla extract.

Working at a low speed, gradually beat in flour and salt until mixture is crumbly, like wet sand. The dough does not need to come together. Pour crumbly dough into prepapred pan and press into an even layer.

Bake for 20-25 minutes, until base is set and edges are lightly browned. Cool completely on a wire rack before topping.

Topping:
3 cups shredded coconut (sweetened or unsweetened)
12-oz good-quality chewy caramels
1/4 tsp salt
3 tbsp milk
10 oz. dark or semisweet chocolate (chocolate chips are ok)

Preheat oven to 300. Spread coconut evenly on a parchment-lined baking sheet (preferably one with sides) and toast 20 minutes, stirring every 5 minutes, until coconut is golden. Cool on baking sheet, stirring occasionally. Set aside.

Unwrap the caramels and place in a large microwave-safe bowl with milk and salt. Cook on high for 3-4 minutes, stopping to stir a few times to help the caramel melt. When smooth, fold in toasted coconut with a spatula.

Put dollops of the topping all over the shortbread base. Using the spatula, spread topping into an even layer. Let topping set until cooled.

When cooled, cut into 30 bars with a large knife or a pizza cutter (it’s easy to get it through the topping).

Once bars are cut, melt chocolate in a small bowl. Heat on high in the microwave in 45 second intervals, stirring thoroughly to prevent scorching. Dip the base of each bar into the chocolate and place on a clean piece of parchment or wax paper. Transfer all remaining chocolate (or melt a bit of additional chocolate, if necessary) into a piping bag or a ziploc bag with the corner snipped off and drizzle bars with chocolate to finish.

Let chocolate set completely before storing in an airtight container.

Makes 30 bar cookies.

She also has recipes for "regular" Samoas, Do-Si-Do's, Tagalongs, and Thin Mints!!

Sunday, April 24, 2011

Cotton Tail Cupcakes

I swear I want to marry Diane.  She has some of the most simple and cute recipes EVER!  Check out these super cute rabbit cupcakes that she made.


Just make your cupcakes as usual.  Any color or flavor will work!  Melt some white chocolate and, using a toothpick or plastic bottle, make oval feet by placing the chocolate on wax paper.  While that is cooling, melt some pink candy melts.  Once the white chocolate has completely cooled, add some of the pink candy melts with a toothpick to form the pads of the feet.  Then let the feet chill.  Take a mini-marshmallow and moisten it, then roll in non-pareils.  For the grass, Diane says she used edible grass that is available at Easter time.  If you can't find any edible grass, you can melt some green candy melts and use a toothpick to make grass "lines", too!

See?!  I told you... super simple and cute!

Images and recipe from Created by Diane.

Thursday, April 21, 2011

Easter Candy Bark

One thing I love about Easter?  Pastel colored EVERYTHING.  When I stumbled across this candy bark recipe, I knew that I was going to have share it with you guys!  Ooo.... ooo... and remember those Hummingbird Nests?  Remember when I said you could make them with just about anything?  Alicia made some with chow mein noodles (and a another recipe) and they look so very yummy!  Check them out right here.  See, told you that they could be made with just about anything!

On to the candy bark...
{source}

Easter Candy Bark
via Gingerbreadcake.wordpress.com
Print it here!

8 ounces semi sweet chocolate chips
8 ounces milk chocolate chips
7 ounces pink candy melts
1/2 cup Spring Oreos -cut in half (they have a yellow center)
1/4 cup Easter Candy Corn
1/4 cup Mini Cadbury Eggs – cut in half (the hard shell ones)
1/4 cup Mini Robin Eggs (malt balls/Whoppers)
1/8 cup M&Ms (You can use whatever kind you like)


Measure out the candy and cookies. Set aside


Lay out a large piece of parchment paper. You’ll use this to make the Easter Candy Bark on.


Put 8 ounces of semi sweet chocolate chips and 8 ounces of milk chocolate chips in a microwavable bowl. Melt the chocolate chips but be careful not to overheat the chocolate.


Spread the melted chocolate onto the parchment paper into an 8 by 11 rectangle. Don’t worry if it’s not perfect.


In a microwavable bowl, melt the pink candy melts. (you can use whatever color you like). Be careful not to overheat the candy melts. Drop the melted candy melts on top of the chocolate.


Using a knife, swirl it up and down. Then swirl it back and forth.


Place the candy and cookies on the melted chocolate/candy melts. Press down lightly.


Allow the Easter Candy Bark to dry for at least 3 hours. Cut into pieces and enjoy!

Just like the Hummingbird Nests, this bark can be made with virtually any type/color of candy you'd like! Shoot... changing up the color can even change the holiday you are celebrating!

Happy hunting!

Saturday, April 9, 2011

Hummingbird Nests

Bird nest goodies are perfect for the upcoming Easter holiday.  This recipe comes from the Disney Family Fun website.

Hummingbird Nests
{click here to print}


1 cup milk chocolate chips
1 cup shredded coconut
Jelly bean eggs

Melt the chocolate chips, following the directions on the bag. When the chocolate is smooth, stir in the coconut, then drop the mixture by the heaping tablespoon onto waxed-paper-lined cookie sheets.

While the nests are still warm, use your thumbs to poke an impression into the middle of each. Cool them, then fill with jelly bean eggs. Makes about 1 dozen.


I've seen these made so many different ways. If you aren't a big fan of coconut you could always use pretzel sticks or any number of other ingredients.

Monday, April 4, 2011

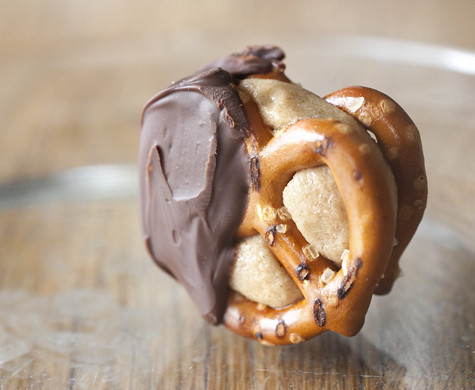
Peanut Butter Pretzel Bites

Image source
I've found an awesome food blog!  It's called 17 and baking.  This week's super easy, super yummy recipe is from her blog!

Peanut Butter Pretzel Bites

1 cup creamy peanut butter
2 tsp butter, room temperature
2/3 cup powdered sugar
3/4 cup light brown sugar
1/4 tsp vanilla extract
Pretzels
2 cups bittersweet chocolate chips


In a small bowl, beat the peanut butter and butter together until smooth and creamy. Beat in the powdered sugar, light brown sugar, and vanilla extract until well mixed – you may need to add more to get the filling thick and stiff enough to hold its shape.


Roll teaspoons of the peanut butter mixture between your palms to form balls. Sandwich between two pretzels and put on a plate or cookie sheet. Freeze the pretzel sandwiches for half an hour.


Melt the chocolate chips, using the microwave (30 second intervals) or a double boiler. Dip half of each pretzel sandwich in chocolate. Return the tray to the freezer and chill until the chocolate sets. Store the Peanut Butter Pretzel Bites in the refrigerator until serving time.

You can find a printer friendly version here.

I'm a fan of white chocolate so I'll probably be using that when I make these, but imagine the possibilities of what you could dip these in!  She has so many other yummy looking recipes so make sure to stop by and visit her too!

Monday, March 14, 2011

Mini Mint Cheesecakes

Ok, so I'm a little late on this.  I even forgot to share a recipe all together last week!  I'm such a bad blogger!  Luckily, while catching up on my Google Reader this morning I stumbled upon one of my favorite blogs, Created by Diane.  If you know me, then you know of my love for all things cheesecake.  Plus I'm nearly as Irish as someone actually born in Ireland, except I wasn't.  Bummer....

Image source
Don't these Mini Mint Cheesecakes look so yummy?  My mouth is screaming "Make me some of dem!"  It's a super simple recipe too!  Stop by her blog to check out the recipe!

Sunday, February 27, 2011

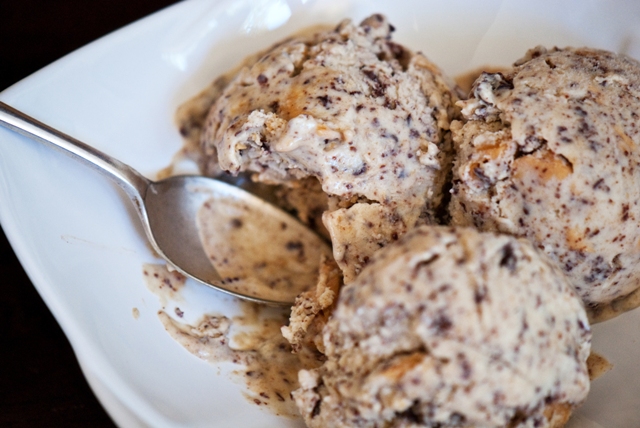
Banana Bread Ice Cream

I found this recipe on my Tumblr dashboard.  Banana bread + Ice cream = Holy crap, are you serious??  After several clicks through three other blogs, I think I found the original author.  As you know I'm just sharing these recipes so I want to give credit (the right credit) where it's due.

via the Guilty Kitchen
source: guilty kitchen
Printable version

Ingredients:
  • 2 lbs ripe bananas
  • 1/3 cup butter
  • 1/2 cup sour cream
  • 1/2 cup brown sugar, packed
  • 1/2 tsp salt
  • 3/4 cup heavy cream
  • 3/4 cup half & half (or for a creamier ice cream use all heavy cream)
  • 2 tsp vanilla
  • 1/2 cup peanut butter (smooth or chunky, natural or not so natural)
  • 1 tbsp icing sugar
  • 3 oz dark chocolate
  • 1 tbsp + 1 tsp butter

Preparations:
  1. In small saucepan melt the butter over medium heat. Continue to cook until it begins to foam and bubble but do not stir. Cook until the foam dissipates and you are left with a browned butter.
  2. In 2 small baking dishes (such as 9″ rounds), slice bananas into coins. Pour browned butter over and coat. Bake in 400°F oven for 20-25 minutes. Your bananas should begin to caramelize and be a bit golden when you take them out. Allow to cool before continuing to next step.
  3. In a blender or food processor, purée the banana/butter mix with the sour cream.
  4. Meanwhile, in a medium saucepan over medium heat, heat cream(s) with brown sugar, salt and vanilla. Do not allow to boil, but just bring to a high enough temperature that the cream begins to steam and the sugar is dissolved. Remove from heat.
  5. Cool to room temperature and add to blender or food processor with puréed bananas.
  6. Cover and refrigerate overnight.
  7. Mix peanut butter and icing sugar until well blended.
  8. On a cookie sheet spoon out small teaspoon sized portions of peanut butter. Place in freezer overnight.
  9. Over a double boiler or a metal bowl set over a pot of gently boiling water, melt chocolate and butter together.
  10. Follow manufacturers instructions for your ice cream maker.
  11. When the ice cream is basically done, begin to drip the chocolate in a fine stream into the ice cream. This will create the stracciatella (little bits of chocolate that melt in your mouth).
  12. Remove ice cream from machine, stir in peanut butter chunks and freeze for at least four hours.